
I’m a tech geek, I’m a gamer. I like merging technology and tabletop roleplaying. While I really did enjoy painting miniatures and we have some 3D dungeon terrain and vinyl maps and area of effect templates and such, I’m kind of over how much room all that stuff takes up. As it is, just sourcebooks and dice fill our game room bookshelves.
Enter the concept of the RPG game table. Specially designed for tabletop roleplaying. There’s loads of pictures on google, to get you started.
My game table was obtained for free from a friend of my husband’s uncle, shortly before we were married. It was our dining room table for many years, and is now our game room table. It’s solid oak, and sturdily made. Or maybe I should say it was solid oak. The top some rather bad gouges from trying to move it from our old house, plus a deep burn area from a stone incense burner, plus cracking/breakage of the veneer. The top was sort of toast, while the bones were still good. I decided to cut a big hole in the top and embed an LCD television I had bought a few years ago into the top. I knew depth would be an issue, so since we were going to need a new, larger top, I decided to put the new tabletop on top of the existing one, to assist with the needed depth of the TV.
And that was a lot harder than I make it sound. 🙂
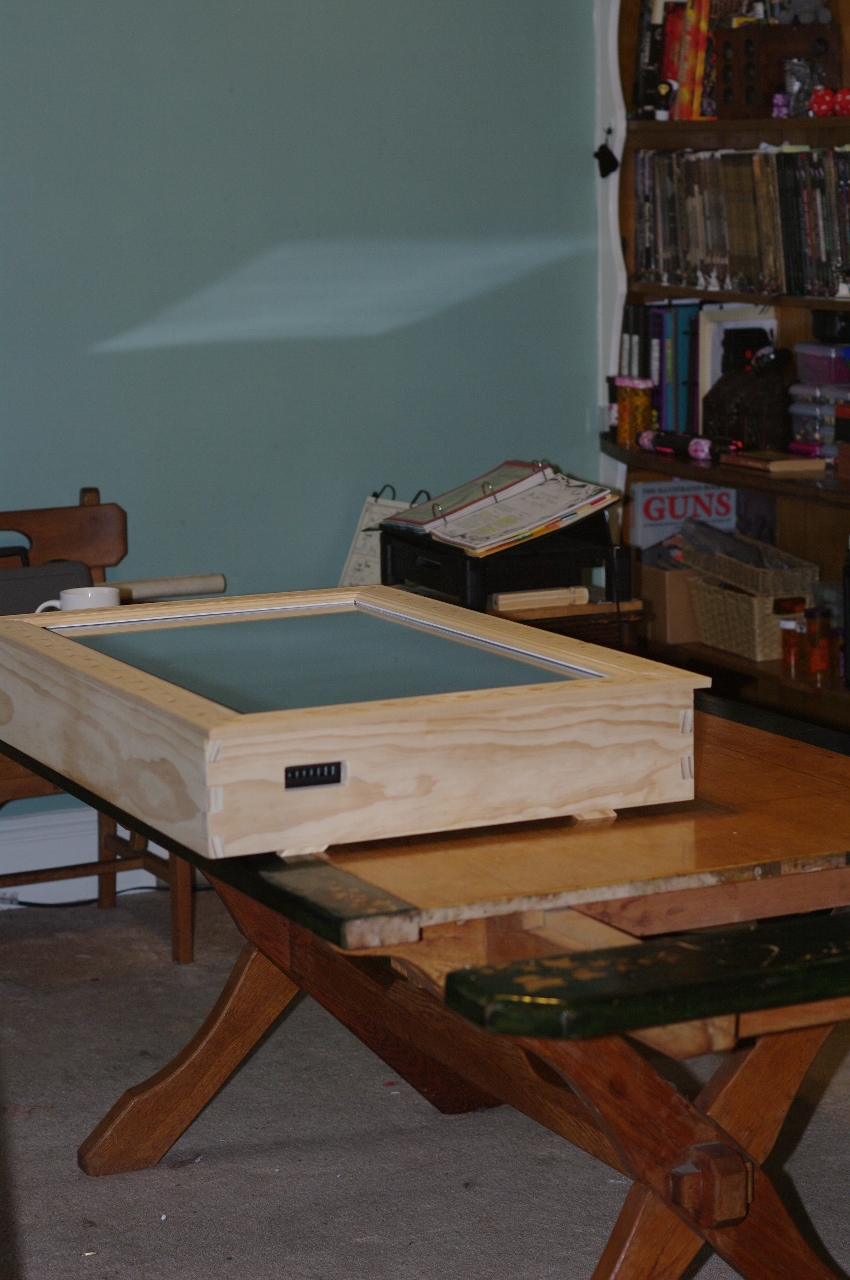 |
Table, Before. The wood monitor casing was created by a friend, and remains a part of the finished product so it can be easily removed and utilized elsewhere. You can see the basic structure of the table with the faux mortise and tenon joints on the table. Those became rather problematic later in the process. |
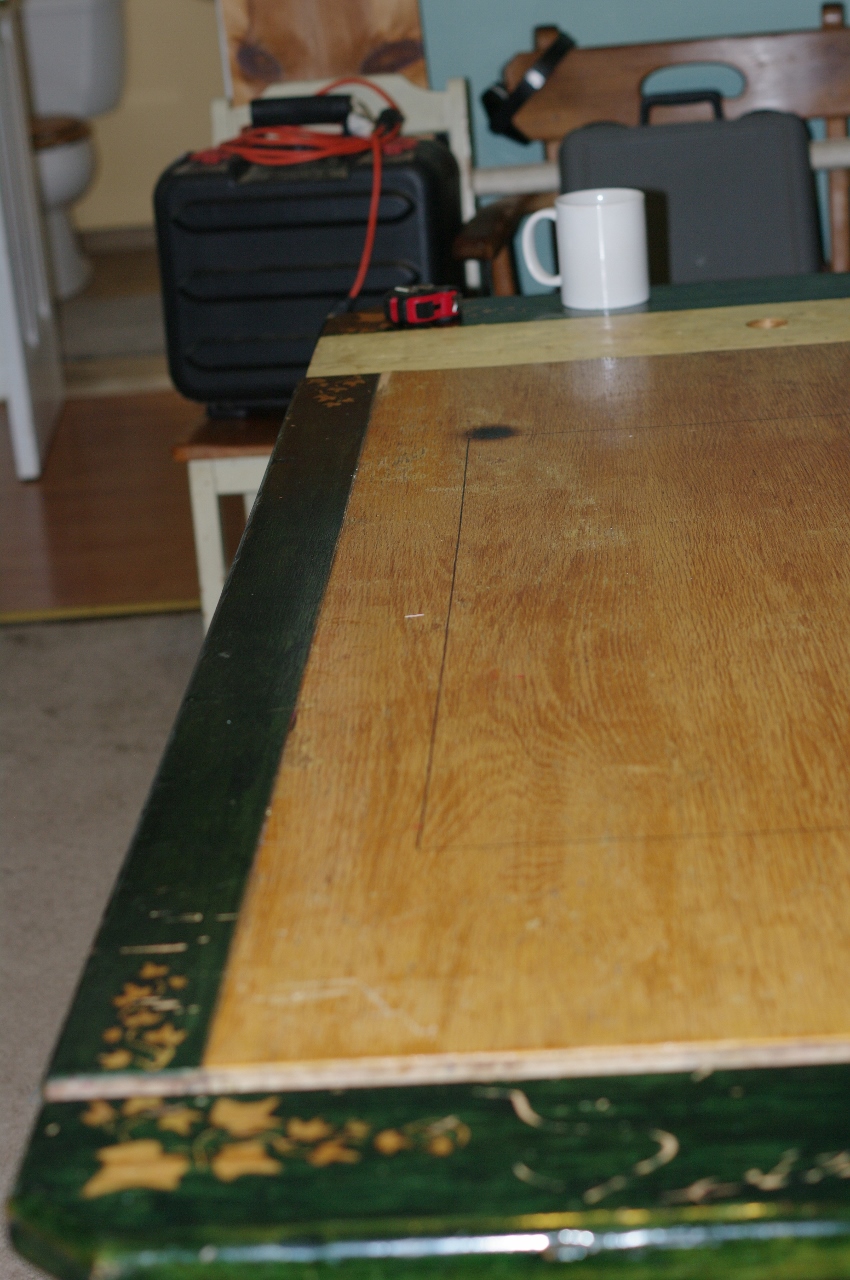 |
Another image of the tabletop before. We centered the monitor and used a pen to draw a line around it for cutting. |
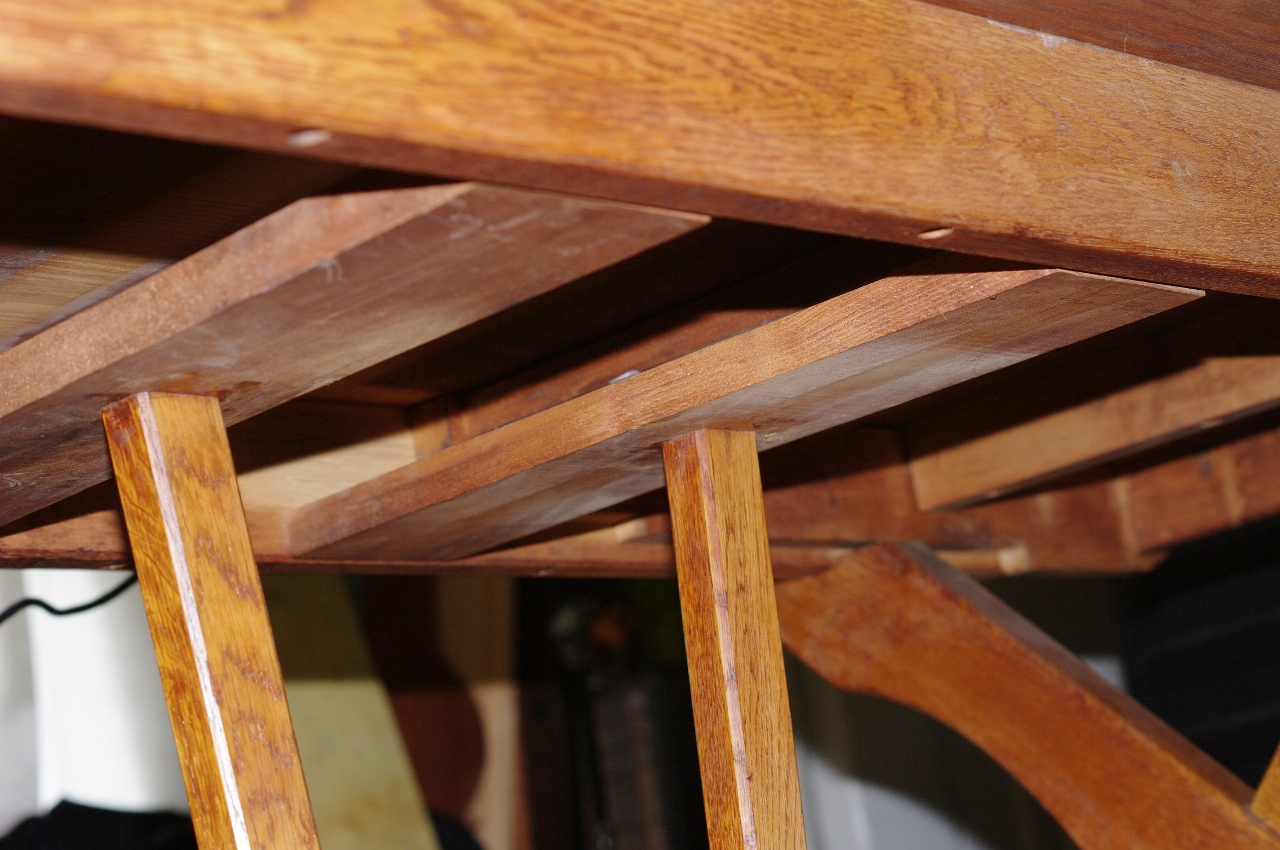 |
Structure under the table, before. The existing central support system was a great find and an important part of construction. The monitor rests on these horizontal support boards and is further supported by the verticals down to the table legs, though we did shorten the verticals to the height we needed. There’s no worry that the monitor is going to fall out the bottom. |
 |
All the work done on the structure of the table. This was all quite scary, not knowing if we’d end up where we wanted or with a destroyed table. The leaves had to be cut and permanently screwed in to make room for the monitor. The table’s glued joints in the legs were found to be pretty loose, which definitely caused some headaches and unnecessary adjustments, but we re-glued and clamped it back together so it’s structurally sound now. |
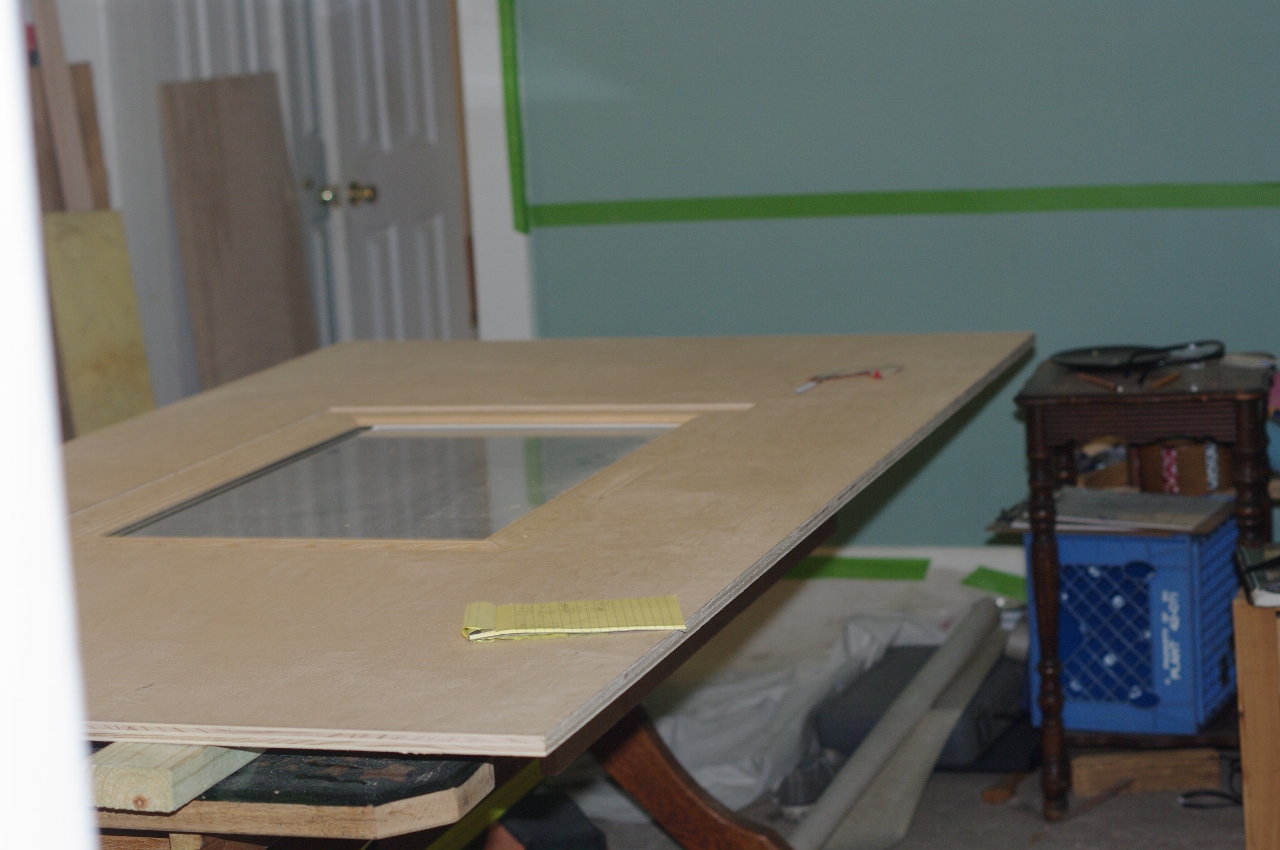 |
The table top is an entire 4×8 sheet of maple plywood. I chose maple because I thought it would stand up to constant dice rolling. 🙂 More measuring was required to allow for the monitor’s frame to drop in successfully. We cut it small, and I did a lot of grinding/sanding to get it to snugly fit around. It’s not perfect, but that’s OK, it’s hard to see any issues in the final result because of the stain color. The plywood actually rests on a number of pieces of support wood, shimmed where necessary to create a good support structure above the table. The top of the monitor frame is 1/4″ below the tabletop surface to allow for a monitor cover. It’s got shims glued to the supports below to level it to the plywood top. |
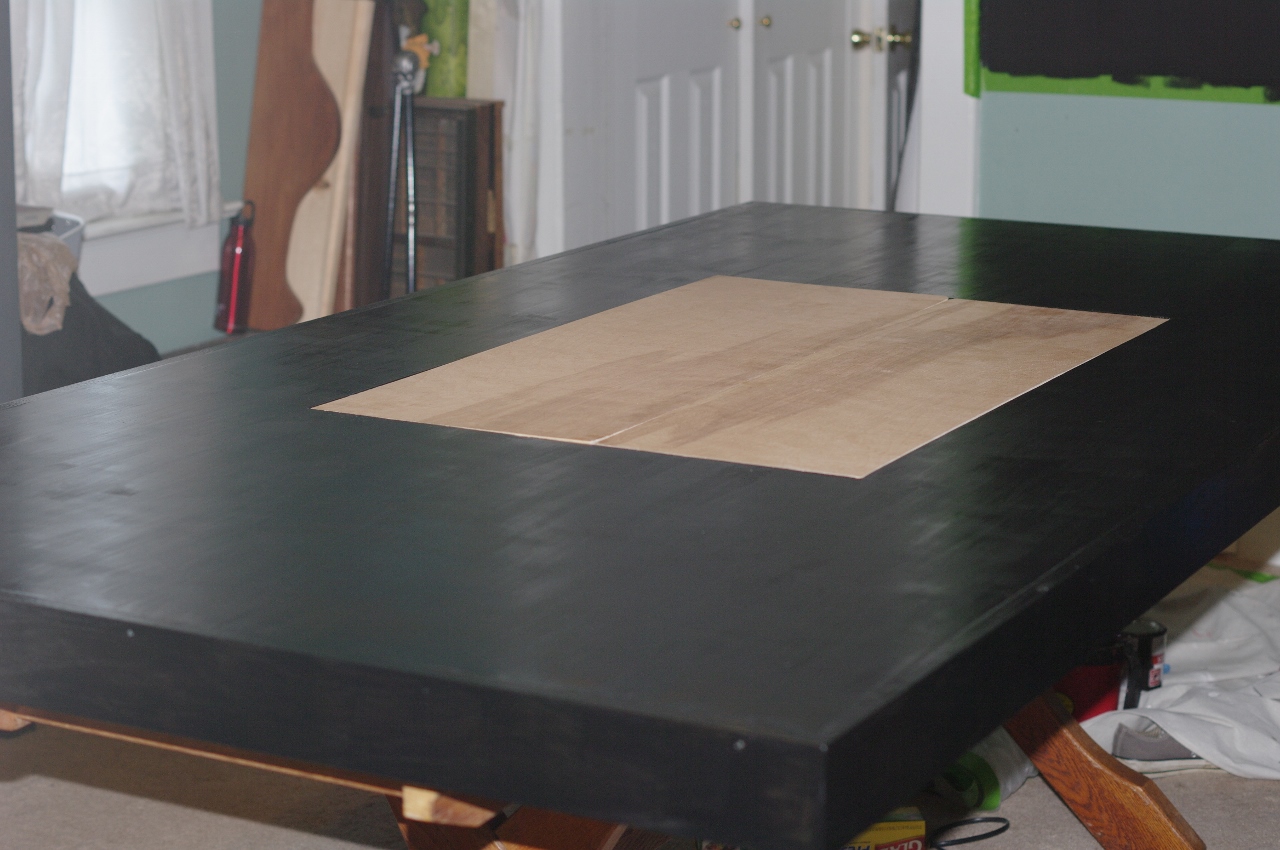 |
Completed tabletop. A 4″ facing was glued and attached with brads around the tabletop. the original table leaves provide backing on the ends, and I screwed in a backing on the sides so that the facing won’t get whacked and break off. My husband wanted black, so I used Varathane Ebony water-based stain + poly. Three coats were applied. The monitor cover is 1/4″ plywood, and the top is flush with the rest of the table to allow for use without the monitor. My husband will work on detailing the cover with his woodburning. I’m envisioning a cool ace of spades. |
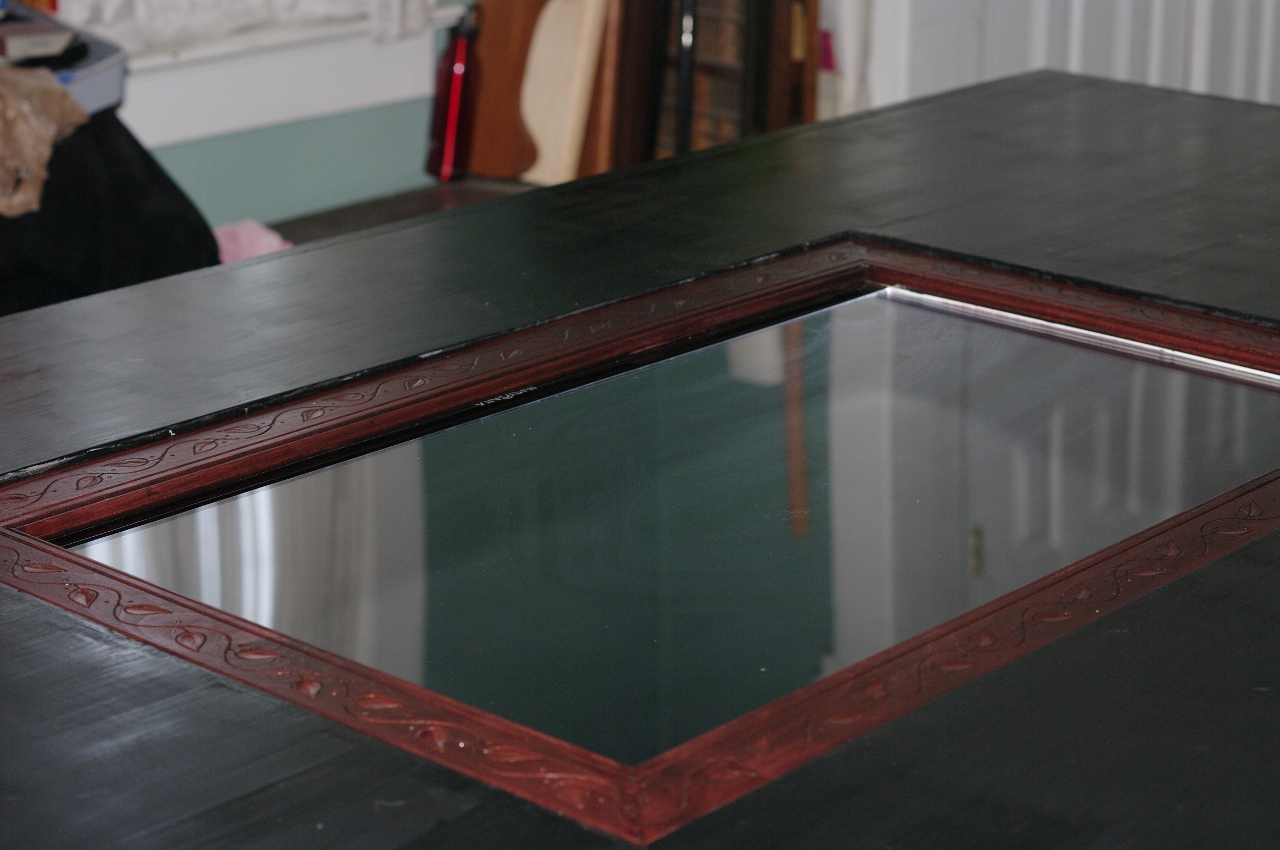 |
Completed tabletop uncovered I used Varathane black cherry water-based stain + poly on the monitor surround to provide some contrast. Looks great. |
Time to complete: Friday evening to Tuesday evening, with long days on Saturday and Sunday. The table had to be finished for a Wednesday game.
Cost: Not cheap. Minus the TV that I bought 4 or 5 years ago I’d put it at around $350, including some mistakes I made that required purchase of additional wood.
Materials:
- A Table
- 8’x4′ maple plywood
- 1″x4″ oak for facing
- 1″x6″ oak for the support structure
- Other wood for supporting the tabletop
- wood glue
- stain
- screws
- shims